Choose your favourite music album or an album that you feel inspires you or connects with any aspect of your life. You can then take your 10 favourite tracks and scrap them as they relate to your life. You can use the title or lyrics for inspiration, or even the way the song makes you feel. This exercise is a good way for you to tell people who you are and what you feel.
A good writing prompt for your journal is using the first time you experience something. Your first holiday, your first kiss, your first day at college, your first boy/girlfriend, your first child. On the days when you need a prompt for your journal writing turn to your list and write about one of the firsts that is relevant to you.
You can also write about the last time you did something. The last time you saw a loved one, the last time you visited a special place, the last book you read… This is a great way to delve into your memories and have fun writing about the last time you experienced a particular event or emotion.
You don’t even need pictures to scrap these firsts/lasts! Just write. Describe the time, place, feelings, thoughts, and decorate the page however you like, and you’re done! If you feel you must have a photo, you can always take one! Or have someone else take one. Or use a photo of you, taken around the same age. No one’s going to care if it wasn’t taken at that precise moment: the photo just needs to give a visual clue or trigger to give an idea of what you were like at that time.
This idea would make a great Book Of Me layout! Make a list of 20 questions and answer them by taking a photograph. This is a fantastic way to let others get to know you through images instead of words.
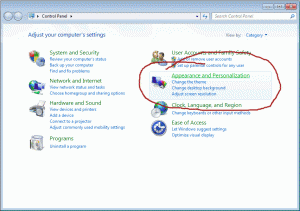
]]>To see all the fonts you have, click the Start button and then select Control Panel > Appearance and Personalisation.
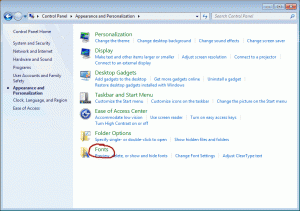
When the Appearance and Personalisation window opens, click on Fonts at the bottom.
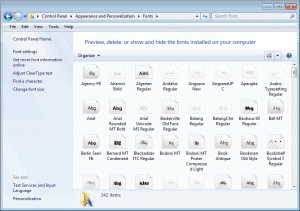
Depending on how many fonts you have on your computer, the Fonts window may take some time to open. When it does, you should see a window displaying a gallery of all your fonts.
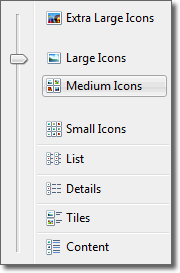
On this window you can change the size of the thumbnail images or even change the display to be a list of font names without a preview image of the font. I find that the best view of the Fonts window to be Medium Icons: viewing icons is good because you get to see what each one looks like, and the medium size is small enough to be able to display more fonts.
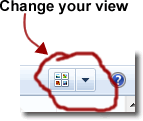
You can change your view by clicking on the icon in the top right of the Font window.
Actually there are two buttons there. The one on the left steps through each view in turn, whereas the one on the right allows you to select one from all the views available:
Using the button on the right is usually quicker as you don’t have to spend time cycling through all the options you aren’t interested in.
]]>This tutorial uses Windows 7, but you’ll find that the process will be pretty much the same whatever Windows operating system you’re using.
It’s a good idea to create a new folder to keep all the fonts you download, just to help with your organisation. In previous versions of Windows you had to right click on the Start button to open Windows Explorer but Windows 7 makes it easy by providing a Windows Explorer button on the taskbar at the bottom of the screen.
Now you need to navigate to a location on your hard drive where you want to create the new folder. I would put it somewhere like My Documents and call in “Fonts”.
Once the Fonts folder has been created, you can download any fonts you want to use into that folder.
Let’s imagine that we’ve found a font we want to use. How do we get it onto our computer? For example, suppose we want to use the Emporium Capitals font on this page. Click on Windows Download button, ensure that Save File is selected on the Opening File window and then click OK.
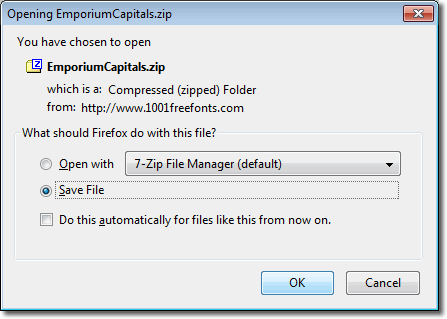
You now need to specify where on your computer you want to save the font, so navigate to the Fonts folder you just created and click Save. In this case, the Emporium Capitals font comes in .zip format. This is just a format that reduces the file’s size, and so takes less time to download. Don’t worry about the definition, the important thing to know is that in Windows 7, all we need to do to get our hands on the font is to double click on the .zip file.
In previous versions of Windows you needed another program like Winzip or 7zip to open zipped up files, but Windows 7 can do it all on its own!
So, find the font file in Windows Explorer and double click on it. You should then see the window below:
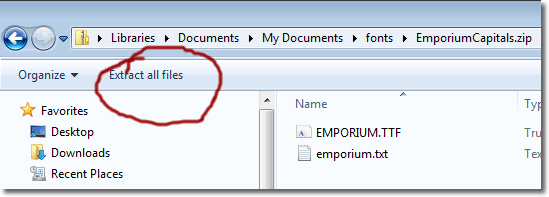
Here, we need to click on Extract all files. The Windows file extractor will default in the location where the .zip file is found, and that is fine. Click Extract and you will find a new folder called EmporiumCapitals with the font inside it. The font is called EMPORIUM.TTF.
Although we now have the font on our computer, we still have another step to perform before we can use it. We need to install the font.
Installing a font in Windows 7 is very easy. Right click on the font file and select Properties. If you can see an Unblock button at the bottom of the window, click it. If you don’t see an Unblock button, proceed to the next step. Right click on the font file and select Install.
All done! The font is now ready for use.
]]>Consider this your first lesson in scrapbooking. With this collection of guides I hope to help all the scrapbooking “newbies” to grow and thrive at this craft, and to help you nurture and develop your creative inspitration. In the first lesson, we’re going to look at some of the buzzwords, common terminolgy, tools and technques used in scrapbooking. After lesson 1, you will feel more comfortable about how to put together a layout, and how to protect your photos and memorabilia using photo-safe and archival products in a creative way.
I’ll first of all begin by telling you a little bit about my own scrapping history. At this point I’ve been scrapbooking for 4 years and have completed 6 family albums, 8 holiday albums, 2 wedding albums, 4 ABC books, and 4 gift albums for my grandmothers. And I’m creating new themes all the time! It’s the fact that I’m completely HOOKED on scrapbooking that keeps inspiring me with new ideas. Scrapbooking is a craft that combines everything that is important to me. I was already filling hard drives with digital phots of my kids, but because I wanted something physical I’d print them off and put them in photo albums.
It was only when I saw a friend’s scrapbook that I realized what a wonderfully creative form this was for my pictures and everything that went with those pictures. Now all our trips and holidays are documented and I have my daughter’s cute sayings immortalised in my ABC book.
Scrapbooks are a way to put the backgroun to the pictures, and are so much more than the who, what, where, why and when. They are a great way to record family traditions, the many funny incidents of childhood, favourite things, achievements…all the things that come together to paint a portrait of our lives.
They are also an excuse to use all these great toys!! So with that said, let’s get to scrapping!
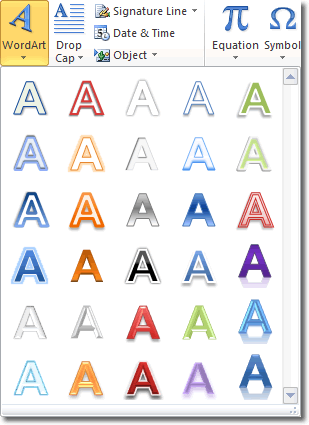
]]>Click Insert > Text > WordArt, and select a style.
Start typing out your text and once finished, click Srawing Tools > Format > Arrange > Rotate > Flip Horizontal.
]]>For all those scrapbookers stuck in the Middle Ages who use Print Artist 6.0 (made by Sierra Home), here are some handy instructions for reversing the text you type.
But did you know that you can also reverse the text so that it displays backwards? You can then print it onto cardstock and you have a mirror image of your title.
I’ve listed here the methods you can use to get reversed text in the various popular computer programs.
Reverse text using:
Font Garden
Fonts
Pizza Dude
House of Lime
how to print directly on to diecuts
Blue Vinyl fonts
Blambot (comic book) fonts
Oz Scrappin
Lettering Delights